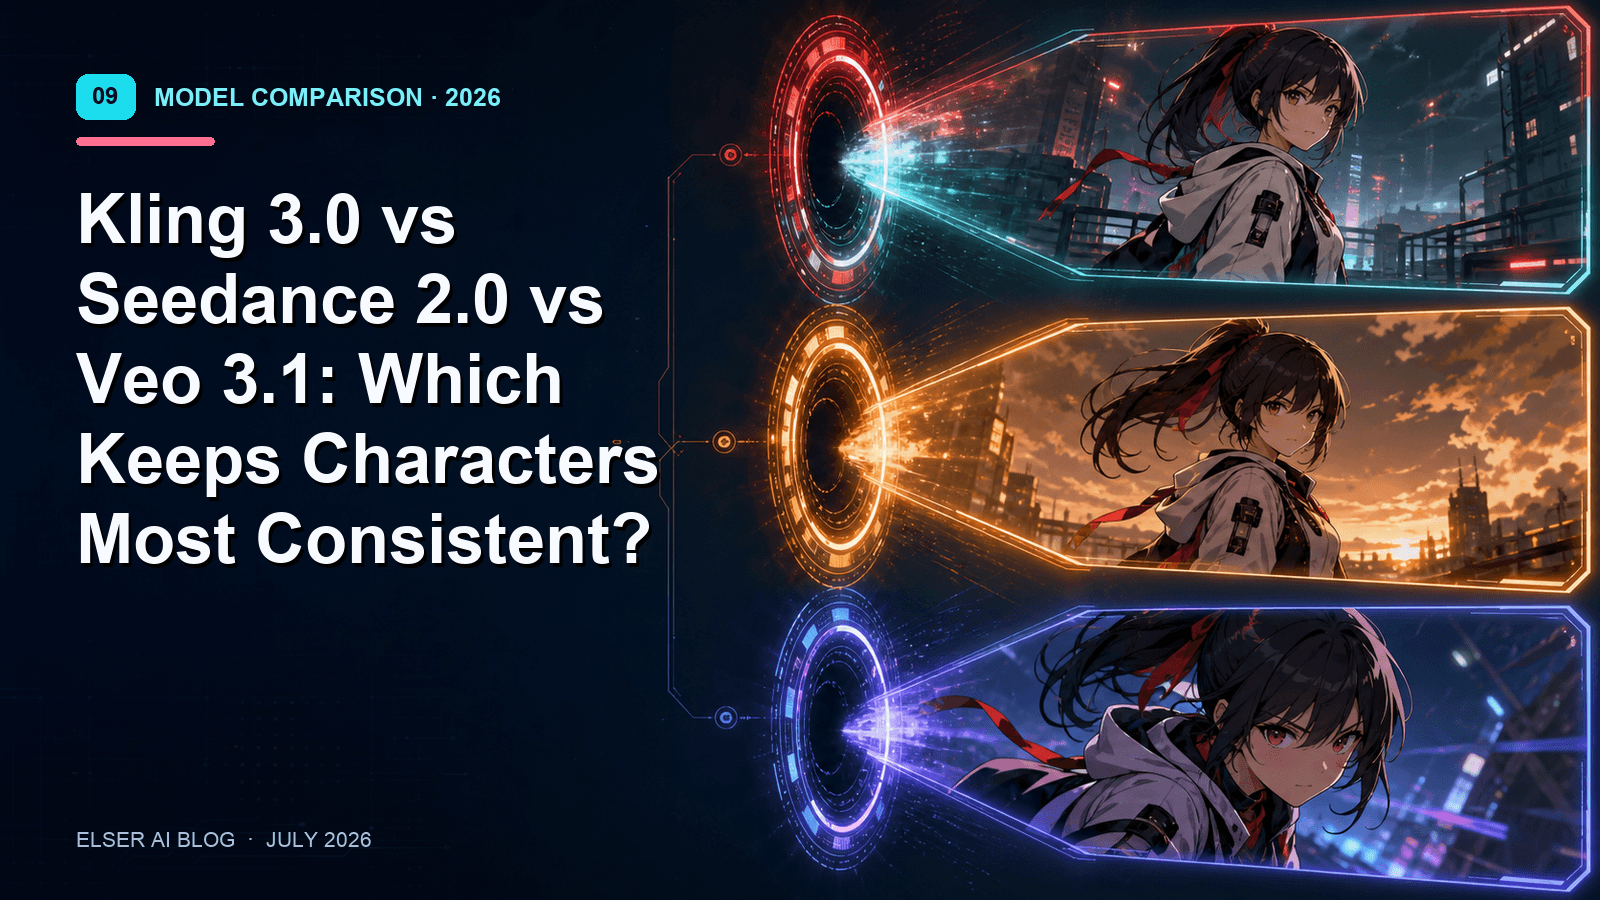
《Der vollständige Leitfaden zu Kling 3.0》
《Der vollständige Leitfaden zu Kling 3.0》
Kling 3.0 hat sich schnell zu einem der am häufigsten gesuchten KI-Videomodelle entwickelt, da es genau die Schnittstelle zwischen „filmischer Kameraführung“ und „einfacher Bedienbarkeit für Kreatoren“ bildet. Doch das Problem ist, dass die meisten Menschen dieses Modell auf die falsche Weise bewerten: Sie erwarten ein glückliches Generierungsergebnis nur mit einem langen Prompt. Um stabile und konsistente Generierungsergebnisse zu erzielen, müssen Sie einen Workflow nutzen, der Kling 3.0 als professionelles Produktionswerkzeug einsetzt: Planen Sie die Kameraschüsse, sichern Sie Referenzmaterial, generieren Sie in Chargen und bearbeiten Sie das Ergebnis anschließend mutig.
Dieser Leitfaden ist speziell für Ersteller konzipiert, die einen wiederholbaren Kling 3.0-Workflow nutzen möchten, der in einem integriert ist. Elser AI Arbeitsdenkweise für den Einsatz in Produktionsumgebungen: Phasenweise Generierung, Auswahl qualitativ hochwertiger Lösungen und entschlossenes Kürzen. Diese Arbeitsdenkweise konzentriert sich darauf, welche Inhalte zuerst generiert werden sollen, welche Einstellungen wirklich entscheidend sind, wie man unaufgestaute Prompts verfasst sowie wie man alle Arten von im praktischen Arbeitsablauf auftretenden Fehlermustern diagnostiziert und behebt.
Falls Sie die maßgeblichen Referenzmaterialien erster Hand zu dieser Veröffentlichung erhalten möchten, schauen Sie bitte in der offiziellen Pressemitteilung von Kuaishou nach der Ankündigung zu Kling 3.0.
Wofür ist Kling 3.0 am besten geeignet?
Kelin 3.0 Sehr geeignet, wenn Sie die folgenden Anforderungen haben:
Kurze, wirkungsstarke Videoclips, die auf dynamische Texturen und die Kamerasprache setzen
Erste referenzpriorisierte Generierungsmethode, die Animationen ausgehend von Bildern oder Schlüsselbildern vorwärts generiert
Iterative Kreativberatung, bei der mehrere Varianten von kreativen Konzepten erstellt und die beste Variante ausgewählt wird
Wenn du die folgenden Anforderungen hast, ist seine Kompatibilität etwas schlechter:
Perfekte Kohärenz für langformatige Inhalte – ohne aufwändige Planung
Ein einzelner Prompt, mit dem sich vollständige, unveränderte Geschichtensequenzen erzeugen lassen
Wie tritt Kling 3.0 normalerweise im tatsächlichen Arbeitsablauf auf?
Abhängig von der von Ihnen genutzten Zugriffsplattform ist Kling 3.0 in der Regel als Reihe praktischer Modi gestaltet, statt einer einzelnen Schaltfläche zum Erstellen von Videos. Die am häufigsten von Content-Erstellern genutzten Modi sind folgende:
Text-generierte Videos zur kreativen Konzeption, schnellen Konzeptexploration und Stilefindung
Bild-zu-Video-Konvertierung zur Erreichung von Kontrollierbarkeit, Konsistenz sowie der Stabilität von Marken oder Charakteren
Referenz zur geführten iterativen Aufnahme: Behalten Sie das Motiv unverändert und passen Sie nur die Kamerabewegung oder die Kameraposition zwischen den einzelnen Aufnahmen an
Im Prioritätsbearbeitungsworkflow ist die Generierung nur ein Schritt in einer großen Bearbeitungspipeline
Auch wenn du noch nie alle Modi ausprobiert hast, kannst du schnellere und bessere Ergebnisse erzielen, indem du einen Modus wählst, der den Einschränkungen deiner Bedürfnisse entspricht: Zum Beispiel „Ich muss völlig neuen Inhalt generieren“ (Text zu Video) oder „Ich muss das ursprüngliche Subjekt unverändert lassen“ (Bild zu Video).
Die praktischsten Denkmodelle
Betrachten Sie Kling 3.0 als „Shot-Generator“ statt als „Film-Generator“.
Wenn du vor hast, einen Mini-Kurzfilm zu drehen, dann konzipiere ihn mit 4 bis 8 Einstellungen, wobei jede Einstellung eine klare Aufgabe hat:
1) Position bestimmen
2)Einführung des Themas
3) Zeige einen Bewegungsrhythmus
4) Reaktionstakt anzeigen
5) Den Siegtreffer schießen
Wenn du die Aufnahme so gestaltest, werden deine Prompts kürzer und die generierten Ausgaben stabiler.
Kernkonzepte, die du kennen solltest, bevor du die Eingabeaufforderung durchführst
Beispielintentionen sind besser als die Prompt-Länge
Einzeilige Prompt-Intentionen sind normalerweise besser als Prompts mit 200 Wörtern.
Verwenden Sie diese Struktur:
Betreff: Wer oder was ist auf dem Bildschirm?
Aktion: Welche Veränderungen gibt es in der Kameraansicht?
Kamera: Einrahmen + Kameraführung
Atmosphäre: Beleuchtung + emotionale Grundstimmung
Stilsperre: Eine wiederverwendbare, kurze und stabile Stilbeschränkung
Motion hat ein Budget
Wenn Sie gleichzeitig zu viele Aktionen anfordern (komplexe Aktionen + schnelle Kameraschüsse + viele visuelle Effekte + Hintergrundwechsel), erhöht sich die Fehlerwahrscheinlichkeit. Bitte beginnen Sie mit Folgendem:
Zuerst die feinen Bewegungen (Mikroausdrücke, sanfte Push-Aufnahmen)
Als Nächstes: Zweiter Takt mit starker Rhythmusbewegung (deutliche Bewegungsrhythmen)
Konsistenz ist ein Workflow-Problem
Die meisten Beschwerden über „Modellinkonsistenzen“ stammen davon, dass zu viele Variablen geändert wurden:
Die Abstände zwischen den Kamerapositionen bei den einzelnen Aufnahmen variieren.
Neuartige Adjektive jeder Generation
Bei jeder Aufnahme die Umgebung wechseln
相反,锁定一个参考包,并在多个镜头中重复使用它。 Wait wait, no, wait "across shots" is "跨多个镜头"?No, "across shots" is "在多个镜头中" is okay. Wait actually, in the context of photography or video production, "across shots" is "在多个镜头之间"?But no, the translation can be natural. Let's just do the most natural translation. Yeah, the final translation is 相反,锁定一个参考包,并在多个镜头中重复使用它。 That's perfect.</think_never_used_51bce0c785ca2f68081bfa7d91973934>相反,锁定一个参考包,并在多个镜头中重复使用它。 Wait wait, no, the user's entire input is a mix of Chinese and English, where the Chinese is the original text to translate, and the English is the translator's notes. But the task says translate zh->de, so translate all the Chinese parts to German, and keep the English parts? No, wait no, wait the output language must be de. Oh! Wait wait, no, maybe the user's input is that the Chinese sentence is the one to translate, and the English is just the surrounding notes, but wait no, the user wrote "TRANSLATE zh -> de" so all the natural language content, but the Chinese parts are zh, so translate those to de, the English parts? Wait no, the output language is de, so even the English should be translated? No, wait no, let's re-read the task instructions carefully: "Translate only the human-readable natural-language content. OUTPUT LANGUAGE MUST BE: de. Keep the original structure, ordering, line breaks, and spacing as much as possible. Preserve every non-linguistic token exactly: JSON syntax, object keys, braces, brackets, quotes, commas, colons, URLs, domains, file paths, placeholders, markdown, HTML, code, numbers, currency symbols, version strings, standalone IDs, and compact units such as 10GB or 1TB. If the input contains JSON, translate only string values that are user-facing copy. Never translate keys such as headers, rows, or videourl. Never spell out punctuation or symbols. Keep `{}`, `[]`, `:`, `,`, and quotes as symbols, never rewrite them as words. Do not add explanations, notes, prefixes, suffixes, markdown fences, or any extra content. Return only the translated result."
Die wirklich wichtigen Einstellungen
Verschiedene Zugriffspfade zeigen unterschiedliche Steueroptionen an, aber in der Regel reichen nur wenige Einstellungen, um zu bestimmen, ob ein Videoausschnitt verfügbar ist:
Seitenverhältnis und Bildkomposition: Zuerst bestimmen Sie diesen Punkt, dann erstellen Sie Prompts, die dieser Komposition entsprechen.
Trainingsintensität: Zuerst gering halten, erst erhöhen, wenn die Kamera stabil ist
Kamerabewegung: Eine Kamerabewegung pro Aufnahme ist eine gute Standardeinstellung
Clip-Dauer: Kürzere Clips sind leichter, die Kohärenz zu wahren und auch leichter zu schneiden.
Wiederholung und Kameraschussauswahl: Es ist geplant, mehrere Kameraschüsse zu generieren und die besten auszuwählen
Wenn Sie Fehler beheben, betrachten Sie die Einstellungen als Debugging-System: Ändern Sie jeweils nur eine Einstellung, sodass Sie genau nachvollziehen können, welche Änderung die Verbesserung bewirkt hat.
Ein vollständiger Arbeitsablauf, der nutzbare Aufnahmen liefert
Schritt 1: Erstellen eines Doppel-Keyframe-Pakets
Erstellen Sie zwei Bilder desselben Hauptmotivs:
Mittelaufnahme, zum Testen von Körperbewegungen und der allgemeinen Stabilität
Nahaufnahme zum Testen der Gesichtsstabilität und der Verschiebung feiner Details
Wenn Sie noch keine Keyframes haben, generieren Sie diese zuerst, verwenden Sie KI-Anime-Kunst-Generator Auf diese Weise beginnt dein Test mit einem einheitlichen visuellen Ankerpunkt.
Sollten die Nahaufnahmen fehlschlagen, wandeln Sie bitte vorübergehend nicht zu einer Mehrfachkamera-Erzählung.
Schritt 2: Vor der Generierung eine Shot-Liste erstellen
Sogar bei 10-sekündigen Videoclips können Storyboards verhindern, dass du zufällige, nicht bearbeitbare Videosequenzen erstellst.
Verwenden Sie dieses Format: Nur Übersetzungsinhalte ausgeben:
Aufnahme 1: Etablissementseinstellung, langsame Push-In-Aufnahme
Einstellung 2: Das Hauptmotiv erscheint, leicht geschwenkt
Aufnahme 3: Action-Sequenz, minimalistische Kameraführung
Aufnahme 4: Nahaufnahme der Reaktion, stillhalten und die Luft anhalten
Schritt 3: Chargenweise generieren
Schritt-für-Schritt-Generierung ermöglicht es dir, „alle Probleme auf einmal zu beheben“ zu vermeiden.
Schritt A: Wählen Sie die stärksten Schlüsselbilder
Schritt B: Erstellen einer Version mit subtilen Bewegungen
Pass C: Erstelle die stark vibrierende Version für die Gewinner
Pass D: Sequenz abschneiden und prüfen, was du tatsächlich als Nächstes benötigst
Schritt 4: Bewerten Sie die Ausgabenergebnisse wie ein Redakteur
Bewerte jeden Schlag (1–5):
1) Identitätsstabilität
2) Handlungsglaubwürdigkeit
3) Kamerastabilität
4) Szenenkohärenz (Beleuchtung/Hintergrund)
5) Bearbeitbarkeit (Wirst du diesen Shot liefern?)
Die Bearbeitbarkeit ist der eigentliche Schlüssel-Leistungsindikator. Schöne, aber nutzlose Aufnahmen verlangsamen deinen Arbeitsfortschritt.
Praxisnahes und effektives Prompt-Framework
Rahmen 1: Absicht der Einzelsatz-Kameraeinstellung
Verwenden Sie diese Option, wenn Sie Stabilität benötigen:
Hauptsubjekt + Aktion + Kameraeinstellung + Atmosphäre + Stil festgelegt
Beispielvorlage (Bitte nicht direkt übernehmen; passen Sie sie an Ihr Thema an):
"Ein einsamer Wanderer dreht sich zur Kamera, es folgt eine langsame Push-In-Aufnahme, Dämmerungslicht und Schatten, melancholische Stimmung sowie filmhafter Anime-Stil."
Rahmen 2: Storyboard-Karte
Wenn du mehrere Einstellungen regierst, nutze diese Funktion:
Bildausschnitt: Weitaufnahme / Mittelaufnahme / Nahaufnahme
Aktion: Ein zentraler Aktionsbeat
Kamera: Maximal eine Bewegung auf einmal
Beleuchtung: Ein klares Set an Einstellungen
Verbotene Änderungsliste: Inhalte, die nicht geändert werden dürfen
„Liste der nicht umzuschreibenden Inhalte“ ist die geheime Waffe zur Sicherstellung der Konsistenz. So teilst du dem KI-Modell mit, welche Inhalte nicht umgeschrieben werden dürfen.
Framework 3: Konsistenzzyklus
Für sich wiederholende Zeichen:
Behalten Sie die gleiche kurze Beschreibungszeile zur Kennzeichnung bei
Behalte das gleiche Schloss
Nur Bewegungen und Kamera zwischen den Aufnahmen ändern
Wenn du jedes Mal die Identifikationszeile änderst, teilst du dem Modell mit, dass es driften kann.
Ihre wiederverwendbare Prompt-Vorlage
Der Zweck der Vorlage ist es nicht, deine Prompts länger zu machen. Stattdessen lassen sie bei mehreren Versuchen eine höhere Konsistenz beibehalten.
Vorlage 1: Referenzbasierte vorlaufende Filmaufnahmen
Betreff: [Wer/Was] (Zeile mit Identifikationsmerkmal, die jedes Mal gleich ist)
Aktion: [Ein Abschnitt an Aktions-Takten]
Kameraeinstellung: [Einzelkamerabewegung: Langsame Einstellung / Sanftes Schwenken / Feststehende Kamera]
Atmosphäre: [Licht + Stimmung]
Stilsperre: [Kurze, stabile Stil-Phrase]
Einschränkungen: Die Kennzeichnung stabil halten; Verzerrungen vermeiden; Verformungen des Hintergrunds vermeiden
Vorlage 2: Produktstilzyklus
Betreff: [product] auf sauberem Hintergrund
Bedienung: Langsame Drehung oder feine Parallaxe
Kamera: Statische oder leichte Dolly-Aufnahme
Beleuchtung: Sanfte Studio-Beleuchtung, saubere Reflexionseffekte
Stil-Sperre: Klar und präzise, kommerzieller Standard, hohe Auflösung
Einschränkungsanforderungen: Die Form des Logos beibehalten; Keine Schmelzeffekte an den Rändern; Den Hintergrund stabil halten
Vorlage 3: Charakter-Enthüllungsaufnahme
Betreff: [Rollenidentitätszeile]
Aktion: Zur Kamera drehen, kleine Veränderung im Gesichtsausdruck
Kamera: Langsame Einschiebaufnahme, Mittelaufnahme
Stimmung: [Tageszeit], [Emotion]
Stil festlegen: [Anime / Filmoptik / Comic-Stil] (wird in der gesamten Sequenz stabil beibehalten)
Wichtige Hinweise: Die Frisur sollte zum Outfit passen
Vorlage 4: Aktionstakt-Einstellung
Betreff: [Rollenidentitätszeile]
Aktion: Eine klare Aktion (Springen / Vorwärts schreiten / Waffe ziehen / Gesten machen)
Kamera: Bewegung minimieren (Vermeide Wackeln beim Stapeln)
Atmosphäre: Hohe Spannung, gerichtetes Licht
Stilsperrung: [Kurzer stabiler Stil]
Bedingungen: Gesicht behalten; Hände behalten; Hintergrundverzerrung vermeiden
Vorlage 5: Einleitungs-Titelsequenz mit mehreren Schnittübergängen
Fügen Sie dies als Titel in jeden Shot-Prompt ein, danach reicht es nur, die Aktion und die Aufnahmeeinstellungen zu ändern:
Identität: [Charakteridentitätsleiste]
Stilsperrung: [Kurzer stabiler Stil]
Welt: [Position + Beleuchtungsstandard]
Verbotene Handlungen: Bitte wechseln Sie nicht Ihre Kleidung; Bitte ändern Sie nicht Ihre Frisur; Bitte verändern Sie nicht Ihr Alter; Bitte ändern Sie nicht den künstlerischen Stil
Wie kann man bessere Effekte bei der Kameraführung erzielen?
Die meisten fehlgeschlagenen KI-Video-Fälle sind so:
Die Kamera bewegt sich gleichzeitig in zwei Richtungen
Der Hintergrund verzerrt sich bei Bewegung
Das Hauptelement „gleitet“ statt sich zu bewegen
Verwenden Sie Kamerabewegungen, die sich leicht klar rendern lassen:
Langsam hineinschieben
Langsam zurückziehen
Sanfte Bratpfanne
Handhaltbarer Mini-Vibrator (Bitte vorsichtig verwenden)
Vermeide die Kombination aus: „Schnelles Zoomen + Schneller Wischpan + Komplexe Bewegungen“ – dies führt sehr leicht zu Bildverschiebungen.
Drei vollständige Mini-Workflows
Das sind gängige Ergebnisse in der Kategorie „vollständige Anleitungen“. Jedes einzelne wurde speziell entwickelt, um Inhaltsabweichungen so weit wie möglich zu minimieren und die Bearbeitbarkeit zu verbessern.
Arbeitsablauf A: Ein 10-sekündiger Filmvorführausschnitt
1) Wählen Sie ein Thema und einen Ort
2) Generieren Sie zwei Keyframes (Mittelaufnahme + Nahaufnahme)
3) Erstellen Sie eine vierstufige Checkliste (Aufbau → Enthüllung → Handlung → Belohnung)
4) Zuerst erzeuge für jeden Shot feine dynamische Effekte
5) Nur die schlechtesten Aufnahmen durch die wiederaufgenommenen Versionen ersetzen
6) Mutig schneiden und während der Bearbeitung Soundeffekte hinzufügen
Prozess B: Charaktergesteuerter Animations-Trailer
1) Charakteridentitätslinie und Stil sperren
2) Vor dem Wechsel des Drehortes halten Sie die Umgebung während 2 bis 3 Aufnahmen stabil
3) Zu Beginn wurden überwiegend Mittelaufnahmen statt Nahaufnahmen verwendet (Stabilität hat Vorrang)
4) Pro Kameraaufnahme nur eine Art von Kamerabewegung einsetzen (eine langsame Push-In-Aufnahme ist die sicherste Wahl)
5) Bewahren Sie die eindrucksvollsten „Highlight-Shots“ für das Ende auf und drehen Sie für diesen Shot mehrere Versionen.
Arbeitsablauf C: Werbegerichteter Produktzyklus
1) Verwenden Sie einen sauberen Keyframe mit scharfen Kanten und stellen Sie sicher, dass die Markierung klar platziert und gut lesbar ist.
2) Wählen Sie eine Bewegungsart: Langsame Rotation oder leichte Parallaxe
3) Halten Sie den Hintergrund übersichtlich, um Verzerrungen zu vermeiden
4) Dreimal aufnehmen und anschließend die schärfste Aufnahme auswählen
5) Fügen Sie so weit wie möglich Textoverlay-Effekte in der Postproduktion hinzu
Wie man mit Texten, Logos und UI umgeht
Wenn Ihr Anwendungsfall Text auf dem Bildschirm umfasst, behandeln Sie ihn bitte als separates Problem:
Halten Sie den Text prägnant und wählen Sie eine größere Schriftgröße.
Wenn möglich, fügen Sie den endgültigen Text bei der Bearbeitung bevorzugt hinzu.
Wenn Sie Text innerhalb des Modells generieren müssen, reduzieren Sie dynamische Elemente und verringern Sie die Komplexität des Hintergrunds.
Wie man audiodominante Clips bearbeitet
Wenn Sie eine Szene erstellen, die eine präzise Timing-Steuerung erfordert – beispielsweise bei den Rhythmuspunkten von Dialogen oder einer musikalisch gesteuerten Erzählungssequenz –, sollten Sie Folgendes tun:
Zuerst die Kameraaufnahmen nach dem Timing konzipieren
Bewegungstakt einfach und knapp halten
Häufiger schneiden (Kürzere Aufnahmen können Artefakte verdecken)
Im Kontext der fähigkeitsrelevanten Hintergründe betonten die Veröffentlichungserläuterungen von Kuaishou ausdrücklich die Audiointegration für Kelin 3.0.
Fehlerbehebung: Fehlerarten und Reparaturmethoden
Problem: Die Charaktere ändern sich zwischen den Kameraschnitten
Behebung:
Wiederverwenden desselben Referenzbildes und derselben Identifikationszeile
Halten Sie den Aufnahmeabstand zwischen benachbarten Aufnahmen stabil
Bewegungsintensität senken
Frage: Bewegungen wirken „schlaff und kraftlos“ oder weisen keine Lebendigkeit auf
Behebung:
Nur ein klarer Handlungsschritt ist gefordert, statt fünf kleine, unbedeutende Einzelschritte.
Einfache Kameranäherungstechniken hinzufügen, statt komplexer Bewegungen des Motivs
Kürze Clips und beschleunige die Bearbeitungsgeschwindigkeit
Problem: Wenn die Kamera bewegt wird, verzerrt sich der Hintergrund
Behebung:
Kamerabewegungen reduzieren
Hintergrund vereinfachen
Verwenden Sie Mittelaufnahmen statt breiter Etablierungsaufnahmen, bis das Bild stabil ist
Problem: Degeneration an den Händen und im Gesicht
Behebung:
Bewegungsintensität senken
Vermeiden Sie extreme Nahaufnahmen, bis das Modell in der Mittelaufnahme stabil bleibt
Wählen Sie ein einfacheres, weniger detailliertes Schlüsselbild
Wie man von einem einzelnen Fragment zu einer Sequenz erweitert
Wenn du eine Erzählung mit mehreren Kameraschüssen umsetzen möchtest, ist dein primäres Ziel nicht “mehr Schüsse”. Sondern “mehr wiederverwendbare Schüsse”.
Zweistufiges Planungskonzept verwenden:
Erste Ebene (Kontinuität): Identitätslinie, Stilsicherung, Umgebungsbeschränkungen
Zweite Ebene (Kamera): Einzelaufnahmeaktion und Kameraposition
Wenn die Kohärenz stabil ist, wird es einfacher, eine Vielfalt an Kameraschüssen zu realisieren.
Preise und Limits, keine Sorgen um die konkreten Zahlen
Die meisten Kreativen verschwenden Zeit, denn sie planen zunächst eine 60-sekündige Geschichte, erst danach stellen sie fest, dass der von ihnen genutzte Nutzungsweg für kürzere Clips, begrenzte Wiederholungsversuche oder auf Credits basierende Generierungsfunktionen optimiert wurde. Besser ist es:
Betrachte deine erste Ausgabe als Testumgebung und nicht als endgültiges Lieferergebnis.
Mehrere Aufnahmerunden planen und die Gewinner auswählen
Proportionale Skalierung: Von 1 Teil → 4 Teile → 8 Teile, nur wenn die Stabilität erhalten bleibt
Wenn Sie Zugriffspfade vergleichen, konzentrieren Sie sich bitte auf die Einschränkungen, die die Produktionsumgebung beeinträchtigen: Wiederholungsbeschränkungen, Optionen zur Exportqualität sowie die Möglichkeit, bei mehreren Aufnahmen die Stabilität desselben Themas beizubehalten.
Veröffentlichung und Offenlegung
Wenn Sie ein Video veröffentlichen, das von KI generiert oder mithilfe von KI stark bearbeitet wurde, können die Plattformrichtlinien Auswirkungen auf die Offenlegungen haben, die Sie vornehmen müssen – insbesondere, wenn es um realistische Personen, newsartige Inhalte oder sensible Themen geht. Vor der offiziellen Veröffentlichung konsultieren Sie bitte die YouTube-Richtlinien zu bearbeiteten oder synthetischen Inhalten.
Wo läuft Kling 3.0 innerhalb von Elser AI?
Wenn Ihr Ziel darin besteht, schnell priorisierte Referenzaktionen zu testen und den Vergleich fair zu gestalten, können Sie den Kling 3 KI-Videogenerator von Ersi nutzen, um dasselbe Schlüsselbild mit Kling 3.0 zu animieren. Wenn Sie diese Ausgabe in einen umfassenderen Arbeitsablauf von Erstellern integrieren möchten, bitten Sie, von Elser AI.
Häufig gestellte Fragen
Eignet sich Kling 3.0 besser für Text-zu-Video oder Bild-zu-Video?
Für die meisten Kreativen ist die Umwandlung von Bildern in Videos ein schnellerer Weg, um die Konsistenz des Inhalts zu erreichen, da Referenzrahmen die Wiedererkennbarkeit und die Komposition des Werks verankern können. Auch wenn die Umwandlung von Text in Videos für Ausprobieren geeignet ist, erfordert sie normalerweise mehr Iterationen und Anpassungen.
Warum sieht mein Ergebnis beim ersten Mal toll aus, wird aber bei den anschließenden Durchläufen schlechter?
Die Varianz bei generativen Videos ist ein normales Phänomen. Kontrollvariablen: Halten Sie die Keyframes unverändert, behalten Sie die Identitätslinien unverändert und ändern Sie jeweils nur einen Inhalt (Bewegungsintensität oder Kamerabewegung).
Was ist die beste Methode, um artefaktfreie, filmisch wirkende dynamische Bilder zu erhalten?
Verwenden Sie feine Kamerabewegungen (langsame Einwärtszoom) in Kombination mit stabilen Keyframes, halten Sie den Hintergrund einfach und schneiden Sie mutig. Kurze, präzise und knappe Szenen schneiden in der Regel besser als lange Szenen mit komplexen Kamerabewegungen.
Wie kann ich dafür sorgen, dass die Charaktere in mehreren Aufnahmen konsistent bleiben?
Erstellen Sie ein kleines Referenzmaterialpaket (Mittelaufnahme + Nahaufnahme), behalten Sie einheitliche Identitätsbeschreibungsleisten bei, wiederverwenden Sie die gleichen stilisierten Sperreinstellungen und vermeiden Sie gleichzeitig übermäßige Schwankungen bei den Aufnahmeabständen zwischen benachbarten Aufnahmen.
Was soll ich tun, wenn der Hintergrund ständig verformt wird?
Reduzieren Sie die Kamerabewegungen, vereinfachen Sie den Hintergrund und wechseln Sie von Weitwinkelaufnahmen auf Mittelaufnahmen, bis das Modell seine geometrische Form stabil und konsistent beibehält. Sobald die Stabilität verbessert ist, führen Sie wieder Weitwinkel-Szenen-Einstellungsaufnahmen ein.
Ist es besser, Untertitel und Kennzeichnungen im Modell hinzuzufügen oder erst in der Nachbearbeitung?
In den meisten Fällen ist das Hinzufügen von Texten im Nachhinein einfacher und besser kontrollierbar. Wenn Sie Texte innerhalb des Modells generieren müssen, reduzieren Sie die dynamischen Effekte und die Komplexität des Hintergrunds, um die Lesbarkeit zu verbessern.
Was für ein Seitenverhältnis sollte ich für YouTube Shorts und Reels generieren?
Wenn dein Ziel Shorts oder Reels ist, plane das Seitenverhältnis 9:16 und gestalte eine für das Anschauen auf dem Handy optimierte Bildkomposition: Hauptmotiv zentriert, deutliche Konturen und einfacher Hintergrund. Wenn du anfänglich mit dem Seitenverhältnis 16:9 arbeitest, führe frühzeitig Zuschneidetests durch, damit du keine Kompositionsfehler erst nach dem Rendern bemerkst.
Wie lang sollte mein Kling 3.0-Prompt sein?
Lange Prompts mögen funktionieren, aber sie verstecken oft Widersprüche. Eine bessere Methode ist die Verwendung eines stabilen Prompt-Frameworks: eine Zeile mit der Identitätsangabe, eine Zeile zur Festlegung des Stils, gefolgt von kurzen, pro Kameraeinstellung geltenden Anweisungen zur Beschreibung von Aktion und Kameraeinstellung. Wenn die generierten Ergebnisse instabil sind, kürzen Sie zuerst den 'variablen' Teil.
Was ist die beste Methode, um Schärfe und Exportqualität zu verbessern?
Beginnen Sie mit sauberen und hochwertigen Keyframes – dies beeinflusst alle nachfolgenden Arbeitsschritte. Wenn Sie klare Aufnahmen von Gesichtern und Händen benötigen, bevorzugen Sie weiche Kameraführungen und Mittelaufnahmen. Anschließend führen Sie Vergrößerung und Schärfung als steuerbare Nachbearbeitungsschritte durch, statt den Generator alle Arbeiten auf einmal erledigen zu lassen.
Wie reduziere ich das Flimmern bei wiederholten Aufnahmen?
Flackern entsteht meist durch übermäßige Bewegung, zu feine Hintergründe oder inkonsistente Beleuchtungshinweise. Bewegungsintensität senken, Hintergrund vereinfachen und die Lichtregeln zwischen den einzelnen Aufnahmen einheitlich halten. Wenn Sie eine Einstellsequenz erstellen, stellen Sie bitte sicher, dass die Aufnahmestände zwischen benachbarten Einstellungen stabil bleiben.