How to Use Kling 3 on Elser AI (2026) — The Complete Creator‘s Guide
If you‘ve been paying attention to the AI video space this year, you‘ve definitely heard of Kling 3.0. It‘s been everywhere since its February 2026 launch, dominating benchmarks and blowing creators‘ minds with its ability to generate coherent, cinematic video from just text or image inputs.
But here‘s the thing: Kling 3.0 is powerful, but it‘s just one model. To build a complete video—with story, consistent characters, voiceover, and sound—you still need half a dozen other tools. Unless you‘re using a platform that brings everything together.
That‘s where Elser AI comes in.
Elser AI integrates Kling 3.0 directly into its creative pipeline, so you can leverage the model‘s video generation power plus Elser‘s scriptwriting, character design, voiceover, and music tools—all in one seamless workflow.
In this guide, I‘ll show you exactly how to access Kling 3 on Elser AI, walk through the model‘s most powerful features (including the game-changing Multi-Shot capability), and share my best tips for getting professional-quality results.
Kling 3.0: Why Everyone‘s Talking About It
Let me give you some context before we dive into the how-to.
Kling 3.0 was released by Kuaishou in February 2026, following the wildly successful Kling 1.0 and 2.x iterations. By the time version 3.0 dropped, the Kling platform had already amassed over 22 million global users and generated more than 168 million videos.
But Kling 3.0 wasn‘t just an incremental update. It was a major leap forward.
According to the ArtificialAnalysis benchmark rankings from March 2026, Kling 3.0 Pro achieved an Arena ELO score of 1240—the highest ever recorded for text-to-video generation. Seven different Kling model variants also made the top 15, marking an unprecedented dominance of the leaderboard.
So what makes Kling 3.0 so good?
Multi-Shot Narrative Generation — This is the headline feature. Previous AI video models essentially generated one continuous shot, limiting storytelling possibilities. Kling 3.0 can generate Multi-Shot sequences with automatic camera angle changes, shot-reverse-shot dialogue, and cinematic pacing. The model understands filmmaking language—not just visual prompts.
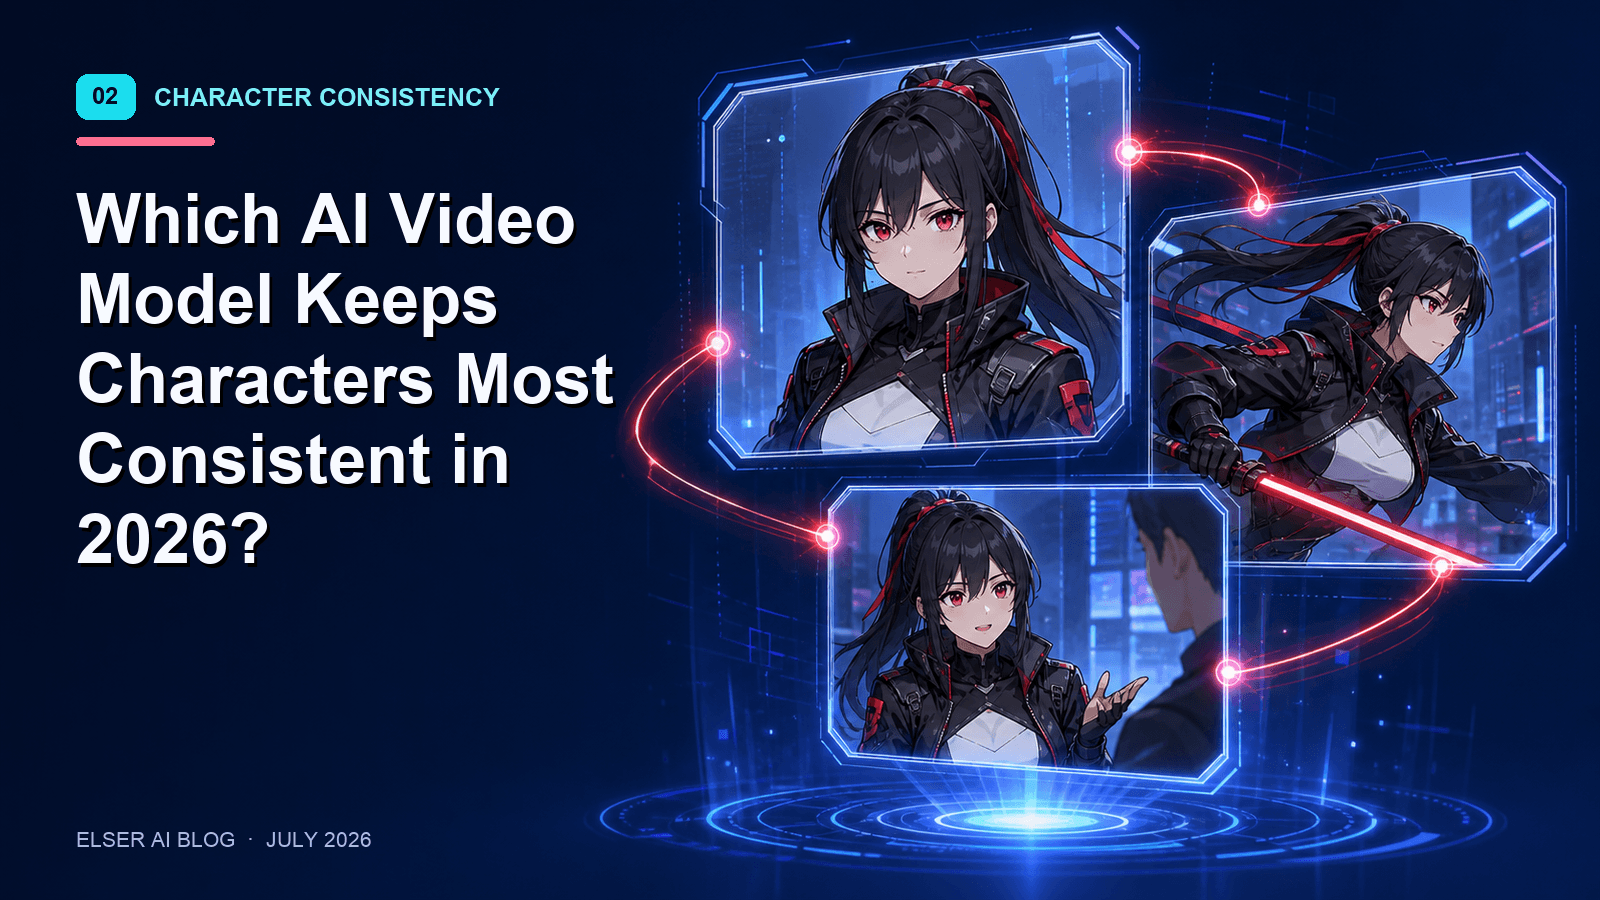
Image-to-Video + Subject Consistency — Kling 3.0 introduced the world‘s first enhanced subject consistency for image-to-video generation. You can provide one or more reference images (or even video clips) to anchor specific characters and elements. The model locks onto their traits and maintains them regardless of camera movement or scene changes.
Native Audio Output — Earlier Kling versions generated silent video that you‘d have to add sound to manually. Kling 3.0 generates native audio—including realistic environmental sounds and voice syncing—across multiple languages, dialects, and accents.
15-Second Continuous Video — Each generation can produce up to 15 seconds of smooth, high-fidelity video. That‘s enough for full scenes, establishing shots, dialogue exchanges, and action sequences.
4K Resolution — Kling 3.0 supports native 4K (3840×2160) video output, making it suitable for professional distribution without upscaling artifacts.
Canvas Agent — This is Kling‘s intelligent assistant that helps you compose scenes, manage multiple elements, and maintain visual consistency across complex projects.
In short: Kling 3.0 is currently the most powerful publicly available AI video model for storytelling applications.
How to Use Kling 3 on Elser AI: Step-by-Step
Now for the practical part. Here‘s exactly how to access Kling 3.0 through Elser AI and integrate it into your creative projects.
Step 1: Log into Your Elser AI Dashboard
If you haven‘t already, create a free account at https://www.elser.ai/. New users receive welcome credits that you can use to test Kling 3.0 generation without spending anything upfront.
Step 2: Choose Your Model
Elser AI aggregates multiple AI models into a single platform. When you start a new video project, you‘ll see a model selection dropdown. Look for “Kling 3.0” or “Kling 3.0 Omni” (the full-feature version).
If you don‘t see it immediately, check your account settings—certain high-tier models may require Pro or Ultimate subscription access.
Step 3: Input Your Source Material
Kling 3.0 supports three input types:
- Text-to-Video — Describe what you want to see in natural language
- Image-to-Video — Upload a reference image (character art, background, object) and the AI will animate it
- Start Frame + End Frame — Provide the first and last frame images; Kling will generate everything in between
For character-based storytelling, I strongly recommend the Image-to-Video approach. Upload a clear, high-quality reference image of your character (ideally one you‘ve already generated or designed in Elser‘s character tool). This gives Kling a solid anchor point for maintaining consistency.
Step 4: Craft Your Prompt
Kling 3.0 understands cinematic language much better than earlier models. Here‘s how to write prompts that get great results:
Use Multi-Shot structure explicitly — Instead of “a warrior fights a monster,” try:
“Establishing shot: A lone warrior stands at the edge of a cliff overlooking a burning village. Medium shot: The warrior turns to face a massive shadowy monster emerging from the smoke. Close-up: The warrior‘s determined eyes. Action shot: The warrior charges forward with sword raised, as the monster roars. Cut to black.”
Kling‘s Multi-Shot feature was literally designed to parse prompts like this and translate them into coherent shot sequences.
Specify camera movements — Use terms like pan, zoom, dolly, tilt, crane shot, tracking shot, over-the-shoulder, and point-of-view. The model understands them.
Describe audio cues — Since Kling 3.0 generates native audio, include sound descriptions in your prompt. For example: “The monster‘s roar echoes across the valley. Wind whistles through the ruins. The warrior‘s footsteps crunch on gravel.”
Reference specific characters by name — If you‘ve uploaded multiple reference images for different characters, refer to them consistently in your prompt (“Mika does X, then Zero responds with Y”).
Step 5: Set Your Parameters
Before generating, adjust these key settings:
- Duration — Up to 15 seconds per generation. For longer videos, generate multiple segments and stitch them together in post-production.
- Resolution — Standard HD or 4K (requires higher-tier access)
- Audio — Enable native audio generation for environmental sounds and dialogue
- Aspect Ratio — 16:9 for YouTube/widescreen, 9:16 for vertical formats (TikTok, Instagram Reels, YouTube Shorts)
Step 6: Generate and Review
Click generate and watch Kling 3.0 work its magic. Generation times vary based on length and resolution—expect anywhere from 30 seconds to a few minutes for complex outputs.
Once complete, review your video carefully:
- Shot transitions — Are the cuts natural and well-paced?
- Character consistency — Does your character look the same across all shots?
- Motion quality — Are movements fluid and physically plausible?
- Audio integration — Do sound effects match the on-screen action?
If you‘re not satisfied, tweak your prompt and regenerate. Kling 3.0‘s prompt adherence is significantly better than earlier models, but it still takes some iteration to get perfection.
Kling 3‘s Best Features (and How to Use Them)
Here are the specific Kling 3.0 features that make it stand out, with tips for getting the most out of each one.
Multi-Shot Narrative Generation
What it does: Generates multiple connected shots in a single pass—establishing shot, medium shot, close-up, reaction shot, etc.—with automatic camera angle changes and pacing.
How to use it effectively: Structure your prompt as a mini shooting script. Use line breaks, shot labels (CLOSE UP:, WIDE SHOT:, etc.), and clear action descriptions. The model was trained on real filmmaking structures, so treating it like a script yields the best results.
Enhanced Subject Consistency
What it does: Maintains character appearance across multiple shots and camera angles, solving the classic “morphing face” problem that plagued earlier AI video models.
How to use it effectively: Provide high-quality reference images with clear, distinct features. Avoid low-res or blurry inputs. For multi-character scenes, upload separate reference images for each character and refer to them by name in your prompt.
Native Audio Output
What it does: Generates environmental audio, voice sounds, and dialogue synced with on-screen action in multiple languages.
How to use it effectively: Include sound descriptions in your prompt (“footsteps on wet pavement,” “distant thunder,” “a crowd cheering”). The more specific you are, the better the audio matching.
Canvas Agent Integration
What it does: Acts as an intelligent assistant that helps you compose complex scenes, manage multiple elements, and maintain consistency across your project.
How to use it effectively: Use the Canvas Agent as your project‘s “director.” Tell it what you want to achieve (“I need a three-shot sequence showing a character receiving bad news and reacting”), and it will suggest prompt structures, camera angles, and scene transitions.
Practical Example: Making a 3-Minute Anime Video with Kling 3 + Elser
Let me walk you through a real-world workflow I used to create a 3-minute anime-style music video using Kling 3.0 inside Elser AI.
Step 1 (Elser‘s AI Script Tool): I started by describing my story concept—“A lone pilot discovers a mysterious signal in deep space and follows it to an abandoned space station.” Elser‘s script generator turned this into a structured 3-act narrative with scene breakdowns.
Step 2 (Elser‘s Character Creator): I designed my protagonist—a young pilot with teal hair, a worn flight jacket, and a loyal robot companion. Elser generated consistent character sheets with front, side, and three-quarter views.
Step 3 (Elser‘s Model Selector → Kling 3.0): I switched to the video generation module and selected Kling 3.0 as my model.
Step 4 (Scene-by-Scene Generation): Instead of generating the whole video at once (which would exceed the 15-second limit), I broke it into 5-second to 10-second scene segments:
- Scene 1 (5s): Close-up of the pilot‘s face as alarms flash in the cockpit
- Scene 2 (8s): Wide shot of the spaceship approaching the mysterious space station
- Scene 3 (6s): Medium shot of the pilot suiting up and preparing to exit
- Scene 4 (10s): Action sequence of floating through zero-G corridors
- Scene 5 (7s): Discovery moment—the pilot finds a glowing energy source
Each scene used the same character references and visual style cues, ensuring consistency across the entire video.
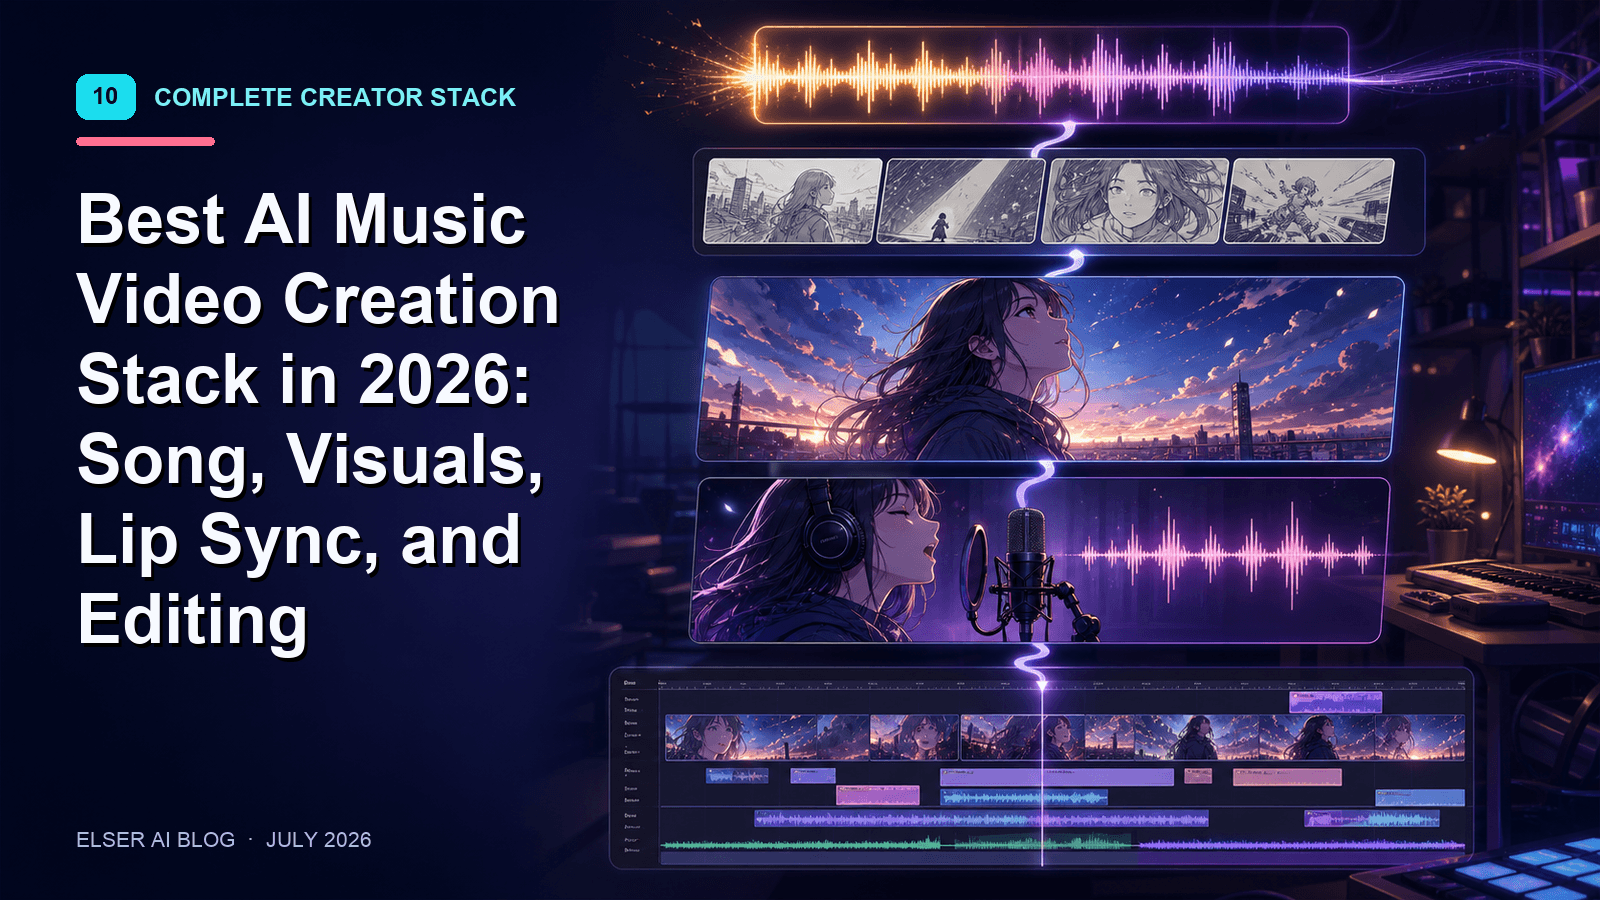
Step 5 (Elser‘s Audio Tools): After generating all video segments, I used Elser‘s built-in voice and music tools to add a synthwave soundtrack and ambient space sounds. The platform‘s lip-sync tool matched the pilot‘s dialogue (recorded separately) to facial movements.
Step 6 (Export & Compile): I exported all segments, dropped them into a timeline (you can do this inside Elser or in an external editor), and had a complete 3-minute animated short ready for upload.
Total production time? About 4 hours—including breaks, coffee runs, and two rounds of prompt adjustments. Without AI, a project like this would have taken weeks or months
Pro Tips for Getting the Most Out of Kling 3 on Elser
After countless generations and more than a few failed experiments, here‘s what I‘ve learned:
Start small. Don‘t write a 30-second prompt for your first test. Generate 5-second sequences and refine your approach based on what works.
Build a character reference library. Create a dedicated folder of your character‘s reference images—different angles, different expressions, different clothing. Use the same images consistently across all your scenes.
Use Elser‘s script tool before video generation. It‘s tempting to jump straight to Kling, but starting with a structured script and storyboard saves enormous time later. Elser‘s script-to-storyboard feature is underrated and incredibly useful.
Embrace iteration. Your first generation won‘t be perfect. That‘s fine. Tweak the prompt, adjust the camera directions, re-upload reference images, and try again. Each iteration teaches you something about how the model “thinks.”
Combine with Elser‘s other tools. Kling 3.0 is amazing for video, but don‘t forget that Elser also handles script writing, character design, image generation, voiceover, and music. Use the full suite for maximum efficiency.
Ready to Create with Kling 3 on Elser AI?
Kling 3.0 is the most powerful AI video model of 2026. Elser AI gives you the easiest way to access it—plus all the other tools you need to turn a raw generation into a finished video.
Stop juggling multiple tools and subscriptions. Start creating cinematic anime videos with Kling 3.0 inside Elser AI.
Try Elser AI with Kling 3.0 integration for free today →
Your welcome credits are waiting. Let‘s make something incredible.