How to Turn Anime Images Into Animated Videos
Turning an anime image into a video sounds simple until the character starts moving.
The first frame may look perfect. Then the hair changes shape, the eyes drift, the outfit adds random details, the background melts, or the model makes the character move like a live-action actor instead of an anime character. The result is technically animated, but it no longer feels like the same image.
The goal is not to make every part of the anime image move. The goal is to choose the right kind of motion for the scene.
AI image-to-video tools are now strong enough to create short anime-style clips, character reactions, music video shots, talking portraits, and manga trailers. But anime has its own visual language: clean silhouettes, controlled expressions, limited but intentional motion, readable linework, and strong composition. If you prompt an anime image like live-action footage, the result often becomes unstable.
Elser AI is built for this kind of workflow because it combines anime image-to-video generation with character creation, storyboards, voices, lip sync, music, sound effects, and video enhancement. That means you can turn one anime image into a polished clip, then expand it into a multi-shot short without losing the character every time you switch tools.
Decide Whether the Image Needs Subtle Motion or Real Action
Not every anime image should become an action scene.
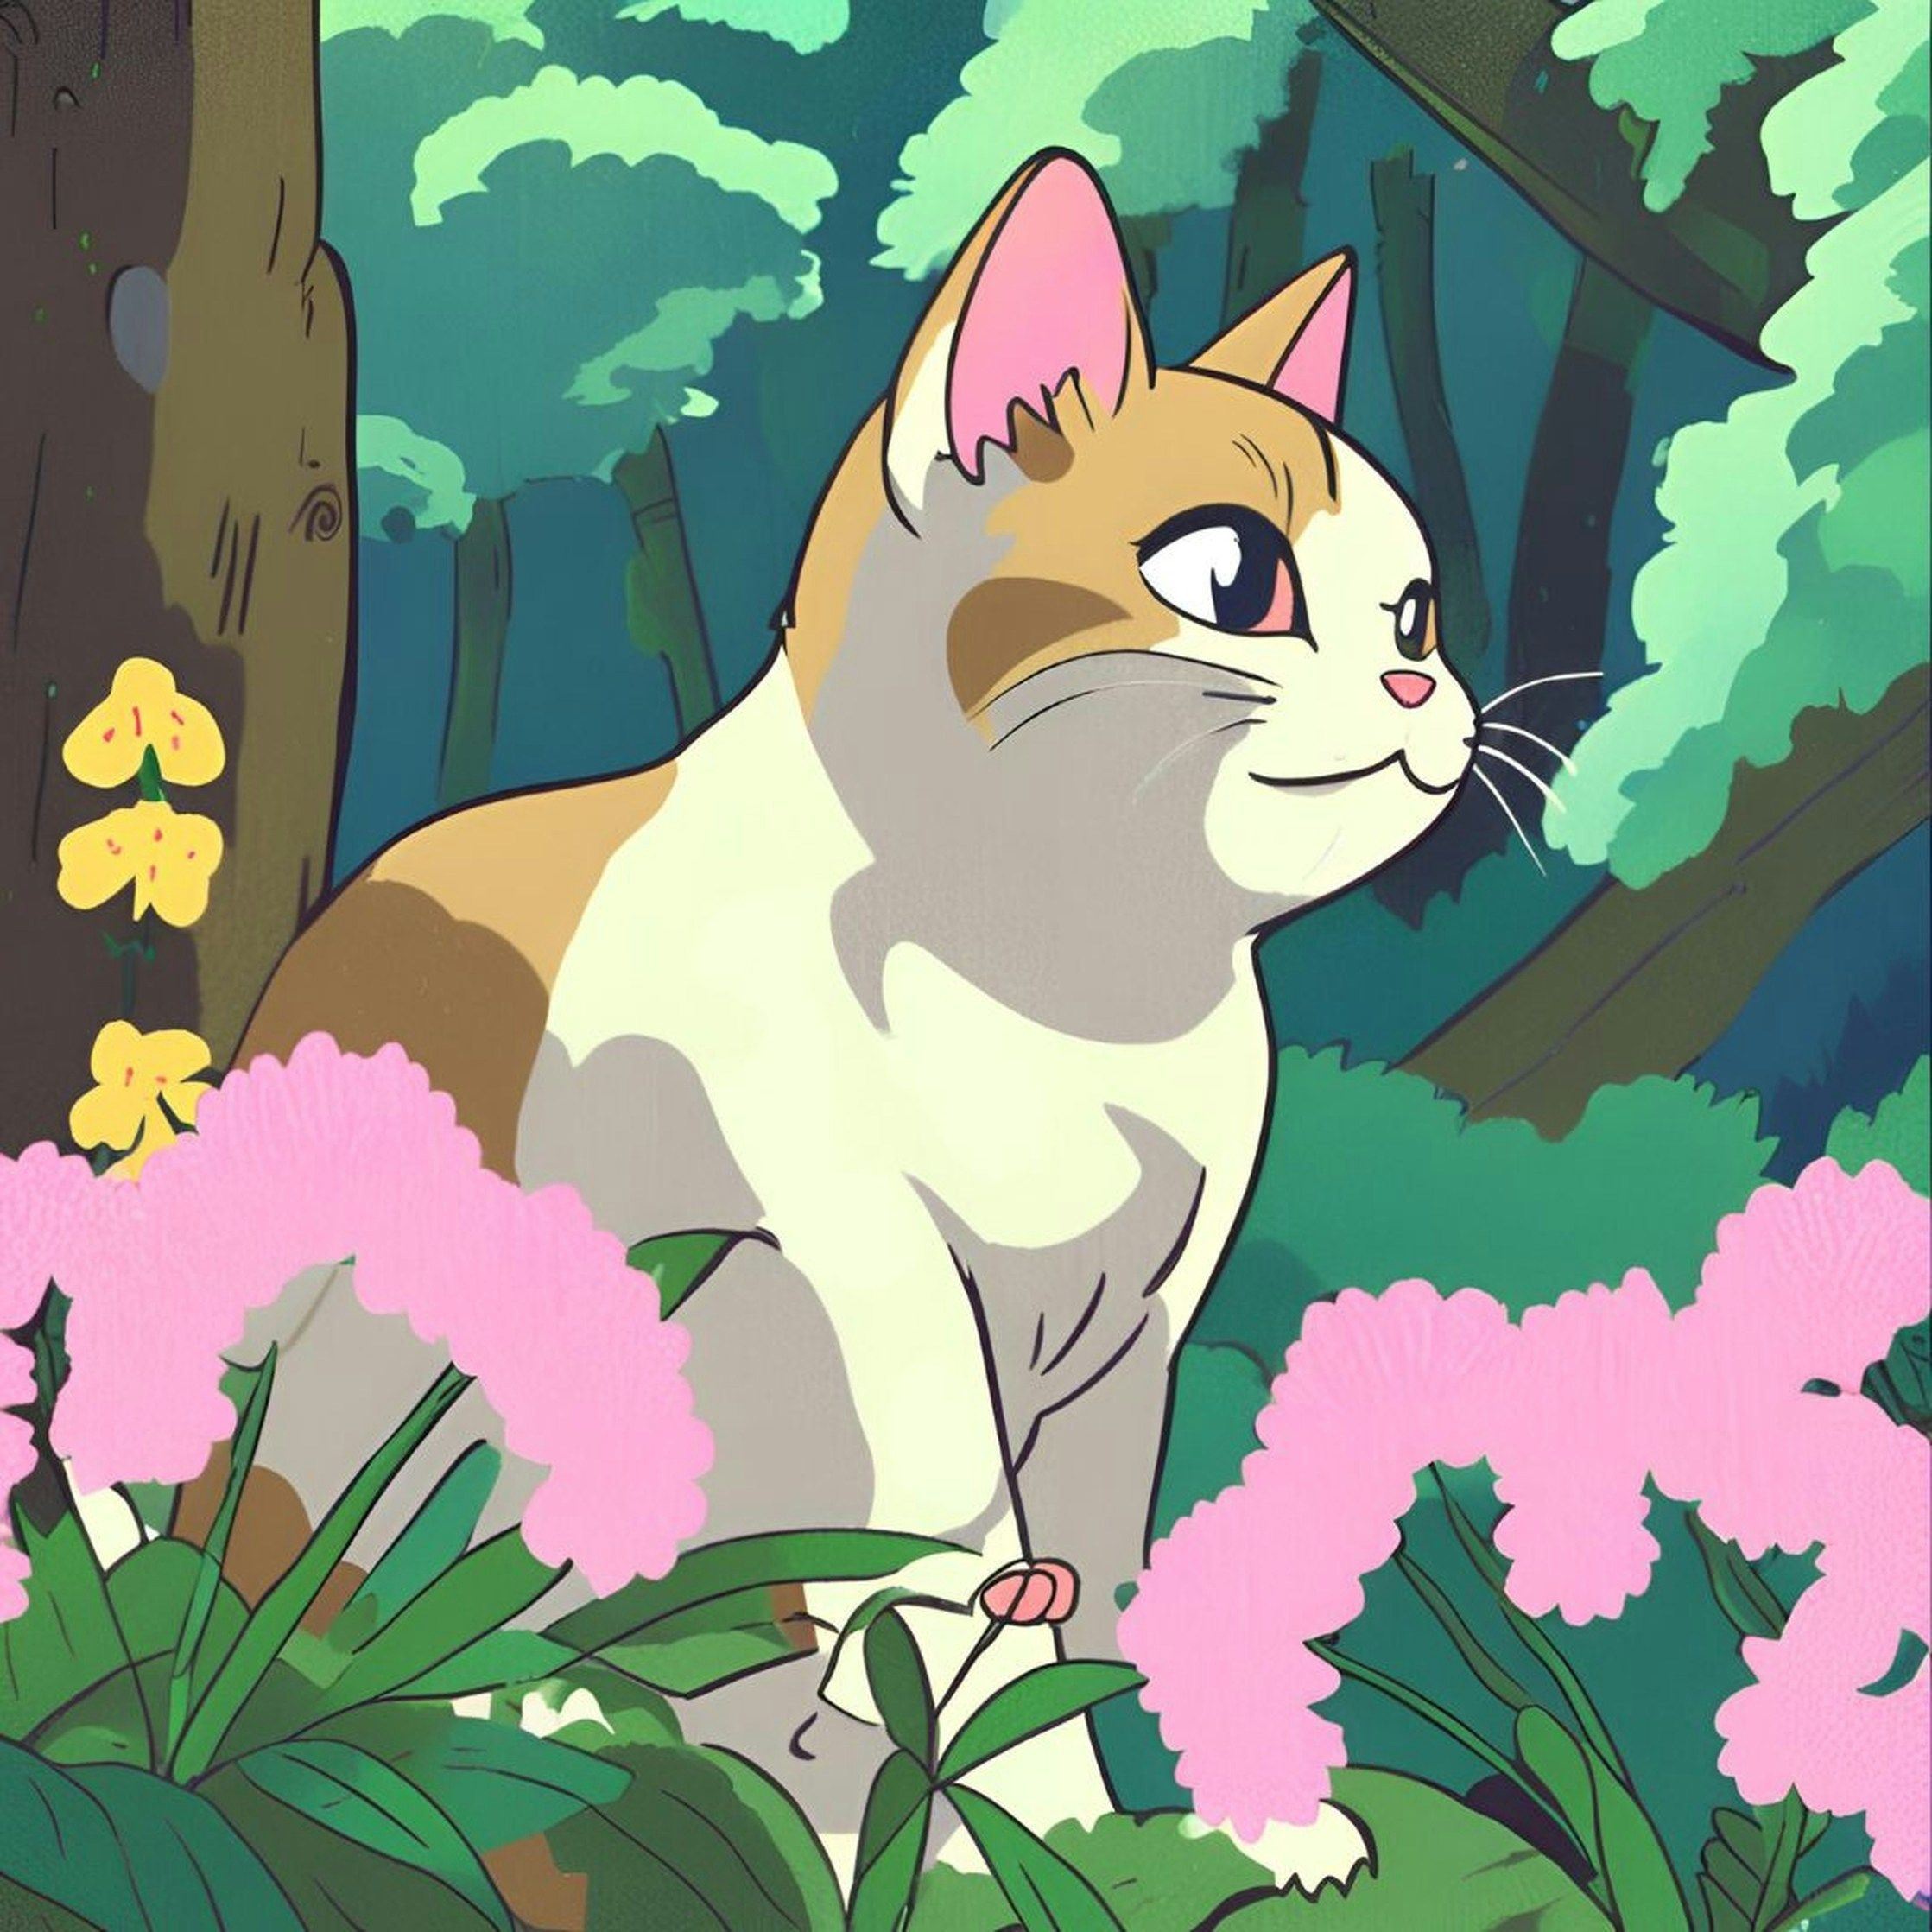
A close-up portrait is best for blinking, breathing, eye movement, hair movement, emotional expression, or lip sync. A full-body image can support walking, turning, posing, or a simple gesture. A wide background can support camera movement, weather, lighting shifts, moving crowds, or atmosphere. A dynamic action pose can become a short impact moment, but it may not handle complex choreography unless the body and environment are clear.
This is the first production decision.
If your anime image is a close-up, do not ask the character to run through a city. If the hands are hidden, do not ask for detailed hand gestures. If only the upper body is visible, avoid full-body dance. AI can guess, but guessing is where character drift begins.
A better prompt for a portrait is:
“Clean 2D anime animation. The character blinks once, breathes subtly, and turns their eyes slightly toward the camera. Hair moves gently in the wind. Keep the same face, hairstyle, outfit, line art, color palette, and background.”
A better prompt for a full-body character is:
“The character takes one small step forward and raises one hand slightly. Camera pushes in slowly. Keep the same face, outfit, body proportions, anime style, and background perspective.”
Elser AI helps here because you can start with the image, then decide whether it should become a reaction clip, talking character, music video shot, or storyboard scene. That prevents the most common failure: asking one anime image to do a full episode’s worth of motion.
Protect the Anime Style Before Adding Motion
Anime images often break when AI adds too much realism.
The model may smooth the line art, add realistic skin texture, change the eye design, create extra clothing folds, or make the background look like live-action. That can be impressive in a demo, but it damages the original style.
Your prompt should include style protection.
Use phrases like:
“2D anime style, clean line art, flat cel shading, stable character design, limited animation, no photorealistic texture, no extra costume details, preserve original color palette.”
This is especially important when using powerful cinematic models. Veo-style cinematic output can be beautiful, but anime content needs deliberate control. Kling-style motion can be excellent for action, but fast movement increases the chance of design changes. Seedance-style multimodal input can be useful when you have character, motion, and audio references, but the references must all support the same style.
In Elser AI, the practical workflow is to create or upload the anime character, generate an approved still frame, then animate only after the image matches your intended style. Do not use video generation to fix a bad still. Video makes problems more expensive.
A useful test is to generate a three-second clip first. If the face or style changes in three seconds, it will not survive a longer sequence.
Use Camera Movement Like an Anime Director
Good anime animation is not always about moving the character. Sometimes the camera does the work.
A still anime image can feel alive with a slow push-in, parallax, drifting particles, moving rain, flickering light, or background atmosphere. This is especially useful for emotional scenes, fantasy reveals, horror tension, music videos, and manga trailers.
For example, an image of a character standing under streetlights can become:
A slow camera push.
Rain moving diagonally.
Hair and coat moving slightly.
Neon reflections flickering.
The character looking up at the final moment.
That is enough for a strong clip.
The mistake is to animate everything at once. If the character moves, the camera spins, the background transforms, the hair flies, the clothes change, and the lighting shifts, the viewer may feel motion but lose focus.
Elser AI’s storyboard workflow helps because you can treat the anime image as one shot in a sequence. A close-up can be followed by a wide shot, then a reaction, then a title card. Instead of forcing one image to do everything, you build a short scene from several controlled shots.
That is how anime images become videos that feel directed rather than randomly animated.
Add Voice and Lip Sync Only When It Helps the Scene
A talking anime image can be powerful, but lip sync should be used carefully.
Use lip sync when the mouth is visible, the shot is close enough, and the line is short. Do not use it for tiny wide shots, extreme angles, covered mouths, or fast action. A simple reaction shot may be stronger without speech.
A good talking anime clip starts with the audio. Write or generate the line first. Keep it short, natural, and emotionally specific.
Weak line:
“I am very sad because of everything that happened in my past.”
Better line:
“I thought I’d forgotten this place.”
The second line gives the character room to act. It sounds like something a person might actually say.
Elser AI’s voice cloning and lip sync tools are useful because the character voice can stay part of the same project as the image and video. For recurring anime characters, voice consistency matters as much as visual consistency. A character who looks the same but sounds different in every clip will still feel unstable.
For anime music videos, use lip sync only for key chorus lines or close-up performance moments. Cut away to atmosphere, action, or symbolic shots between singing lines. That is how real music videos avoid visual fatigue.
Turn One Anime Image Into a Multi-Shot Video
The best way to expand an anime image is not to make one long generation. It is to create a short sequence.
Take the original image and build around it:
Shot one: atmospheric establishing shot.
Shot two: the original image as a close-up or medium shot.
Shot three: small character motion.
Shot four: reaction, object, or environment detail.
Shot five: final title or emotional beat.
This works especially well for TikTok, YouTube Shorts, anime trailers, and manga promos.
For example, one image of an anime girl holding a glowing letter can become:
A close-up of the letter glowing.
Her eyes opening.
Wind moving her hair.
A camera pullback revealing the rooftop.
A whispered line: “It found me again.”
That is a complete micro-scene. It does not require full animation. It requires directed moments.
Elser AI gives creators a practical path for this because the same anime image can move into storyboard, video generation, voice, lip sync, sound effects, music, and enhancement. You can create a polished short instead of exporting one isolated AI clip and trying to rescue it in editing.
Final Takeaway
To turn anime images into animated videos, start by respecting the image.
Choose motion that fits the composition. Protect the anime style. Use camera movement instead of forcing excessive character action. Add voice and lip sync only where they strengthen the scene. Build short sequences from controlled shots rather than trying to generate an entire episode from one image.
Elser AI is a strong choice because it connects the full anime image-to-video workflow: character creation, storyboards, animation, voices, lip sync, music, sound effects, and enhanced exports.
The best AI anime videos do not move the most.
They move with purpose.