AI Character Turnaround Prompts: Generate Front, Side, and Back Views Consistently
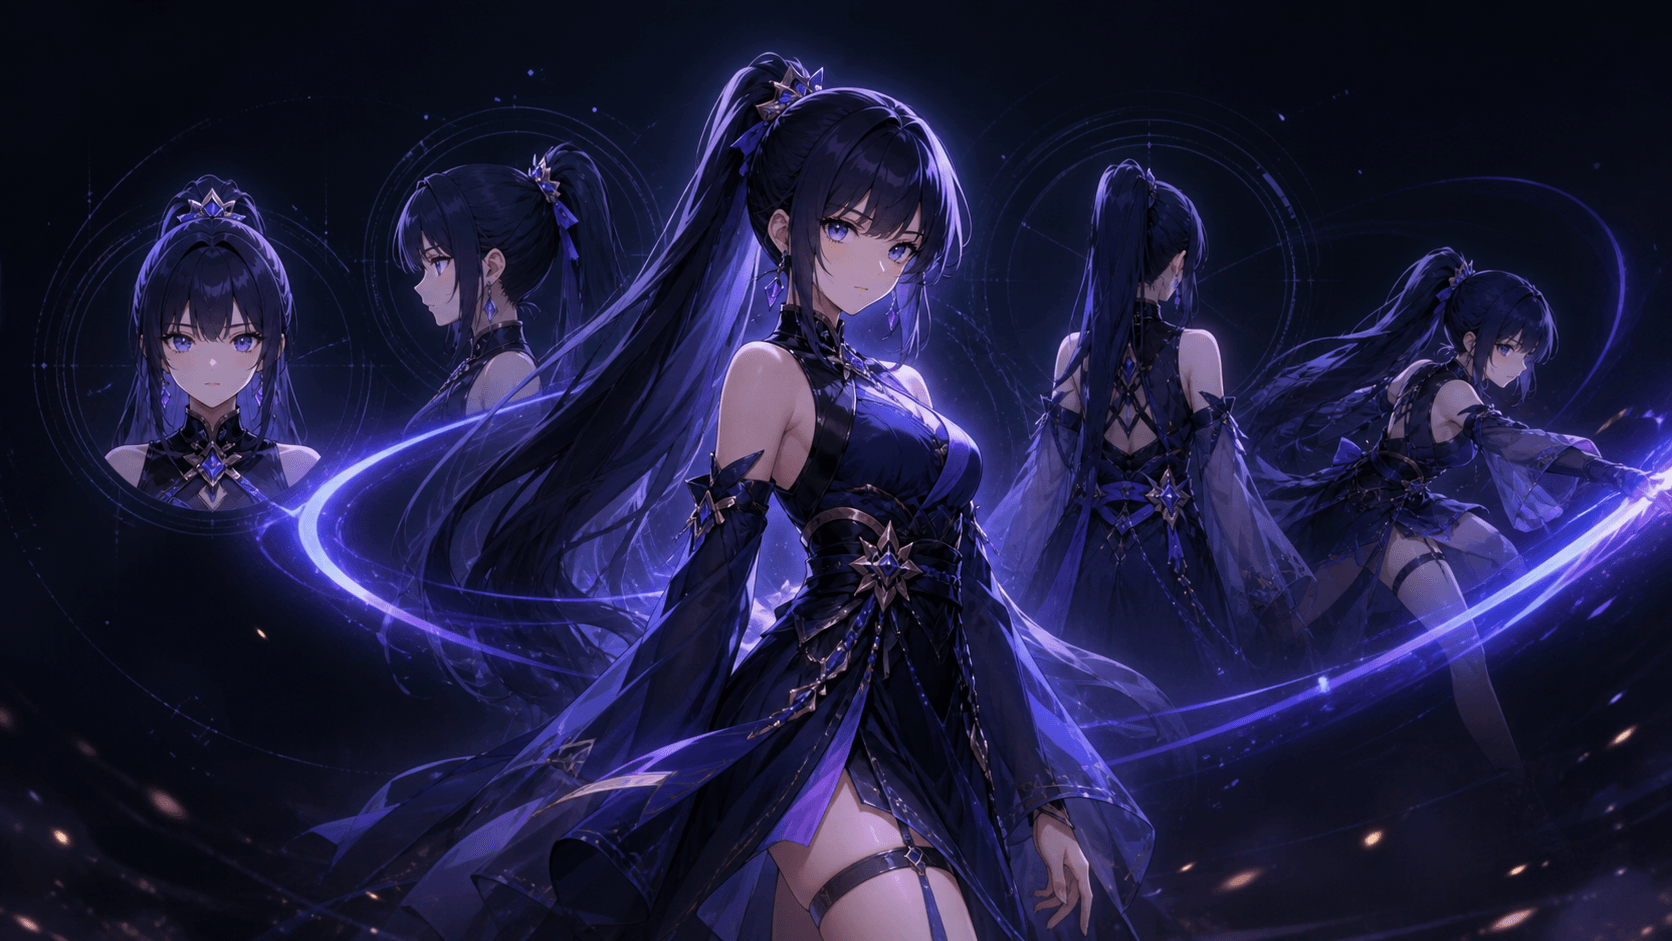
A character turnaround is a specification, not a collage. Each view must describe the same body, costume, proportions, and design from a different angle. Generative tools often produce four attractive relatives instead: eye shape changes, hair reverses, accessories migrate, and hidden garment details are invented.
This guide uses a two-stage approach. First define a canonical character. Then rotate that approved design under controlled conditions. The prompts are model-neutral; adapt reference and layout syntax to the tool you use.
If you need the character’s story and visual identity to develop together, start in Elser AI. Register, approve one canonical design, and only then build the turnaround.
What a Production-Ready Turnaround Contains
At minimum, create front, left profile, back, and three-quarter views in the same neutral stance and scale. A more useful sheet also includes:
- head close-ups from front and profile;
- hairstyle construction and back attachment;
- hands, shoes, and key props;
- neutral plus core expressions;
- costume layers and hidden closures;
- flat palette and material notes;
- height or proportion guide.
Do not ask one generation to solve every panel immediately. Generate and approve the front view, establish the back design separately, then assemble a clean sheet from verified views.
Prepare the Canonical Description
Write observable, non-conflicting facts in a fixed order:
Young adult anime character; 7.5-head proportion; narrow oval face; amber almond eyes; short black layered hair with one copper streak above the left eye; warm medium skin; charcoal cropped pilot jacket with high collar and five brass fasteners; cream shirt; brown belt with pouch on character-right; dark tapered trousers; black knee boots; clean cel shading; dark brown line art; restrained teal-and-copper palette.
Then create a “never change” list: facial structure, hair part and streak side, height, body proportions, garment construction, accessory side, palette, line weight, and rendering style.
Core Turnaround Prompts
Front View
Full-body orthographic front view of the approved character, neutral A-pose, feet parallel, arms slightly away from torso, level head, neutral expression. Match the identity and costume reference exactly. Flat studio lighting, plain light-gray background, no perspective distortion, no props, no text, no extra panels.
Left Profile
Exact same approved character and outfit in a full-body left profile, orthographic side view. Preserve height, head-to-body ratio, face silhouette, hair volume, copper streak placement, collar, five fasteners, belt, character-right pouch, trousers, and boots. Neutral A-pose, flat light, same scale and background.
Back View
Exact same approved character shown directly from the back. Reveal consistent hair construction, jacket rear seams, collar height, belt path, pouch attachment on character-right, trouser fit, and boot design. Neutral A-pose, orthographic view, same scale, palette, line art, lighting, and background. Do not redesign hidden details.
Three-Quarter Front
Exact same character rotated 45 degrees toward camera from the left. Full body, neutral stance, no pose change. Preserve both visible eyes, jaw, hair part, costume construction, accessory side, proportions, and cel-shaded style. Same focal length, scale, and studio background.
Three-Quarter Back
Exact same character at a 45-degree rear view. Show the relationship between hair, collar, back seams, belt, pouch, and boots. Preserve identity and measurements from the canonical views; neutral stance, flat light, no new accessories.
Detail-Sheet Prompts
Head Rotation
Five separate head studies of the identical character: front, three-quarter left, left profile, three-quarter back, back. Neutral expression, same scale, hair and facial geometry, plain background. No makeup or age variation.
Expression Sheet
Six expressions for the approved character—neutral, small smile, concern, restrained anger, surprise, sadness. Identical head angle, face structure, hair, line art, and lighting. Change expression only; no costume or camera variation.
Costume Construction
Technical costume sheet for the approved pilot outfit: front, back, collar close-up, cuff, five-fastener closure, belt and character-right pouch, boot. Same colors and materials; clean separated panels; no redesign or decorative additions.
Hair Construction
Hairstyle reference for the approved character: front hairline, side layering, crown, and back shape. Preserve short black layered hair and copper streak above the character’s left eye. Neutral head, flat colors, no face redesign.
Proportion Guide
Full-body character beside a simple 7.5-head proportion guide. Exact canonical outfit and neutral stance, orthographic front view, no perspective. Clean production reference; no measurements or text unless the tool renders typography reliably.
Save the approved views as character references in your workflow. In Elser AI, use them to test a storyboard close-up, full-body scene, and rear angle before committing to animation.
A Controlled Generation Sequence
1. Approve the Front View
Choose for identity and construction, not decorative detail. Repair anatomy and remove ambiguous accessories. This becomes the primary authority.
2. Design Hidden Information
The front cannot define rear seams, hair volume, cape attachment, or back fasteners. Create and approve the back intentionally. If the model invents them, record the chosen solution in text.
3. Generate One Angle at a Time
Separate outputs provide more control and resolution than a crowded sheet. Use the same canvas ratio, subject scale, background, pose, lighting, and prompt block.
4. Align and Compare
Place views on guides. Eye line, shoulders, waist, knees, and soles should align. Compare silhouette widths and accessory positions. Flip a profile temporarily to spot asymmetry, but remember that intentional left/right details must not be mirrored.
5. Assemble the Sheet
Build the final layout after views pass review. Label angles in a conventional editor rather than trusting generated text. Include version, date, palette, and character-state label.
Common Failures and Repairs
The Back View Becomes a New Costume
Provide an approved back design or a precise construction description. “Same outfit” cannot specify unseen topology.
Left and Right Keep Swapping
Use “character-left/right,” not just “left/right.” State the landmark relationship—“copper streak above character’s left eye”—and reject mirrored outputs early.
Proportions Change by Angle
Use orthographic language, identical scale, a neutral stance, and alignment guides. Dramatic lenses and poses belong in concept art, not model sheets.
Multi-Panel Sheets Mix Identities
Generate views separately and composite. If the tool supports multiple reference images, assign roles clearly. Seedance 2.5 can accept extensive reference sets for video, but even there, coherent labeled inputs matter more than raw quantity.
The Design Is Too Detailed to Reproduce
Simplify elements that repeatedly drift. Production design balances distinction with repeatability. Reserve intricate motifs for close-up variants rather than every frame.
From Turnaround to Motion
Turnarounds describe appearance, not performance. Add a pose sheet, expression range, movement notes, and a short image-to-video test. Keep the first motion simple: slow head turn, two steps, or coat movement in a breeze.
Evaluate facial identity at maximum rotation, garment topology during movement, hair occlusion, and accessory side. Correct the character assets before scaling. A faulty reference multiplied across 30 shots is expensive.
Validate the Sheet With a Reconstruction Test
Give the finished sheet—not the original concept prompt—to a fresh generation session and request a neutral three-quarter full-body view. If the new result cannot recover the face, silhouette, costume, and accessory placement, the sheet is underspecified or internally inconsistent. Add the missing back, profile, or detail view rather than compensating with a longer prose prompt.
Also print or view the sheet at its likely working size. Tiny details that disappear at storyboard resolution should not carry essential identity information. Promote crucial shapes into the silhouette or color blocking, and reserve micro-patterns for close-up references.
When the model sheet passes, register with Elser AI and carry the same character into script-driven scenes instead of starting each shot from a fresh description.
FAQ
Can AI generate a complete turnaround in one prompt?
It can generate a useful concept, but panel-to-panel consistency often needs separate views, selection, correction, alignment, and compositing.
What pose is best?
A neutral A-pose with feet parallel and arms slightly separated reveals costume construction while avoiding severe overlap.
Should the sheet use perspective?
Minimize it. Orthographic-style presentation makes proportions easier to compare. Cinematic perspective belongs in shot design.
How do I stop accessories from switching sides?
Use character-relative directions, include front and back references, repeat the constraint, and review every output before it becomes a new reference.
How many views do I need for AI video?
Four basic views are a strong start, but hair, clothing, hands, props, and expressions often need detail references. Add only what recurring shots require.
Conclusion
Reliable turnarounds come from controlled rotation of an approved design. Define the character with observable facts, solve hidden construction, generate angles separately, align landmarks, and treat the final sheet as versioned production data.
To turn that sheet into a coherent anime project, start creating with Elser AI and validate the character across real storyboard angles before producing the episode.